Respondus Campus Wide: Import a Text/Word File with Questions into Canvas
Respondus Campus Wide is used to import question files and then push the questions to Canvas as quizzes or question banks. Text or MS Word files can be used to import questions, but must be formatted a specific way. Correct answers are designated with asterisks.
A one-time setup to connect Respondus to Canvas must be performed. See the Instructions for Adding a New Server
Format the Text or Word Document Properly
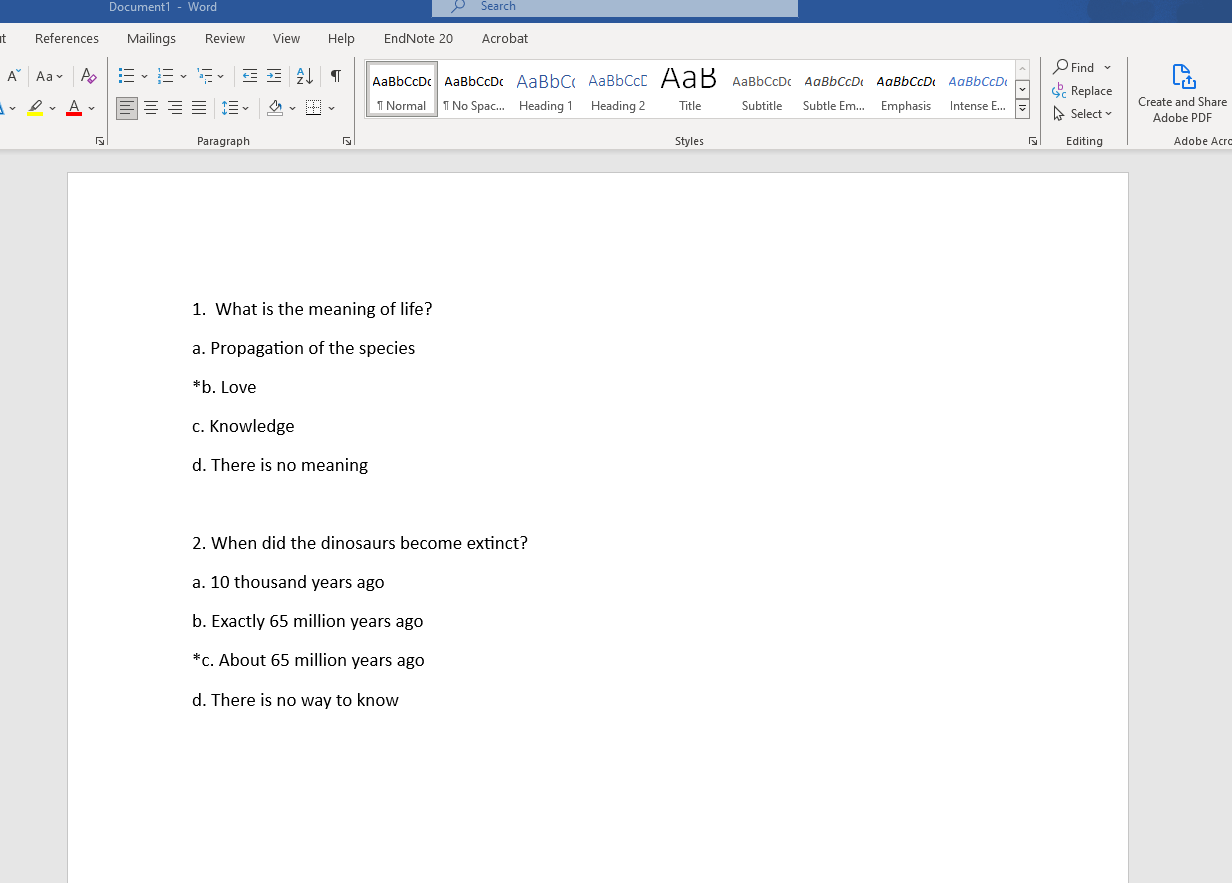
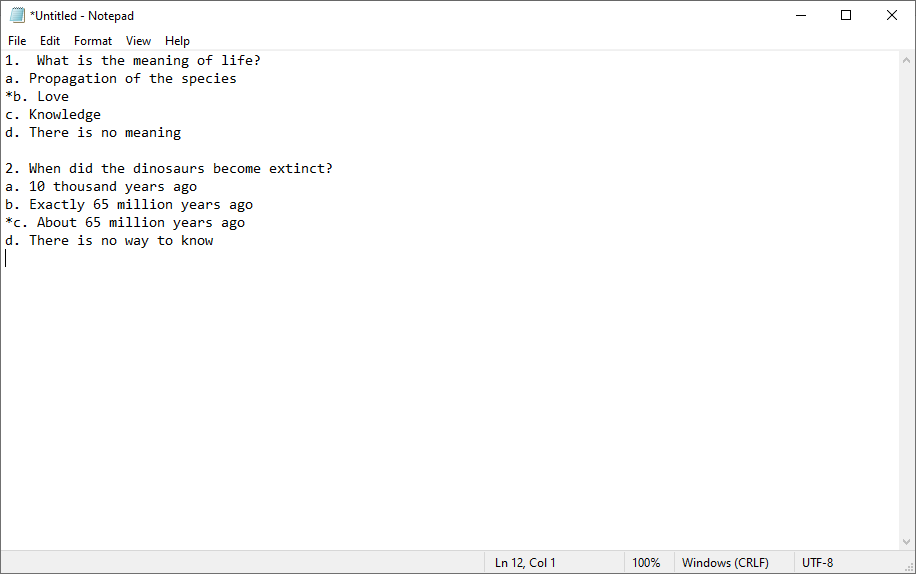
When importing a Word or Text file quiz into Respondus, spacing and punctuation is very important:
a) Make sure there is a period after the number of the question, followed by a single
space.
b) After you write the question, press enter only once to begin typing in the letter
choices.
c) Each letter choice should have a period after it, followed by a single space.
d) The asterisk should be placed before the letter of the correct answer, with no
space between.
e) Press enter twice after the final answer choice of each question.
Word File Format
Text File Format
The above examples show the formatting for multiple choice questions. Respondus can import other question types as well. Please visit the Respondus Resources page for more details.
Import Quiz Document into Respondus
1. Open Respondus.
2. In the Current Personality drop menu, select “Canvas.” 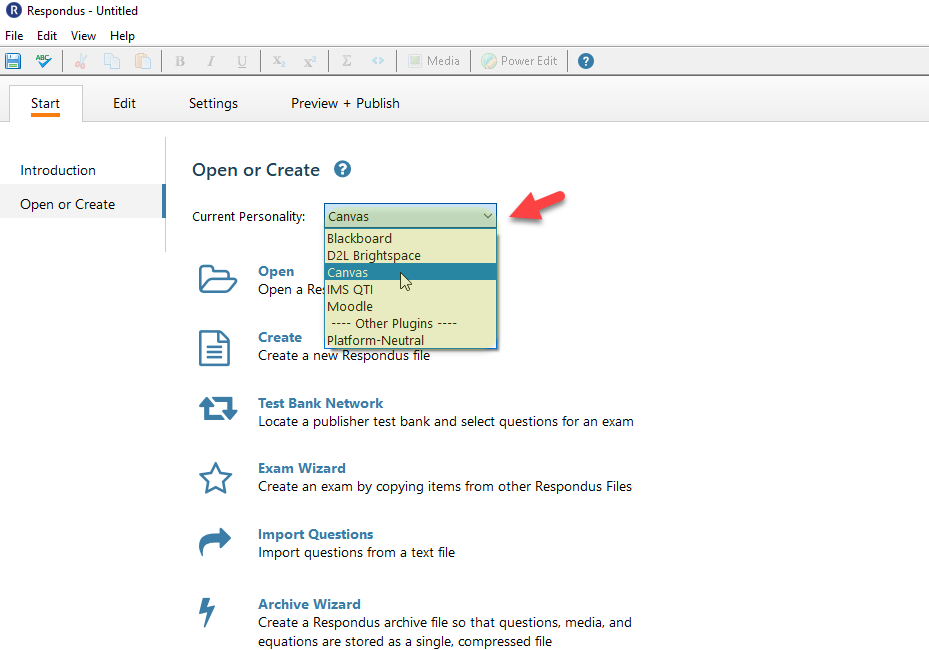
3. Click the Import Questions button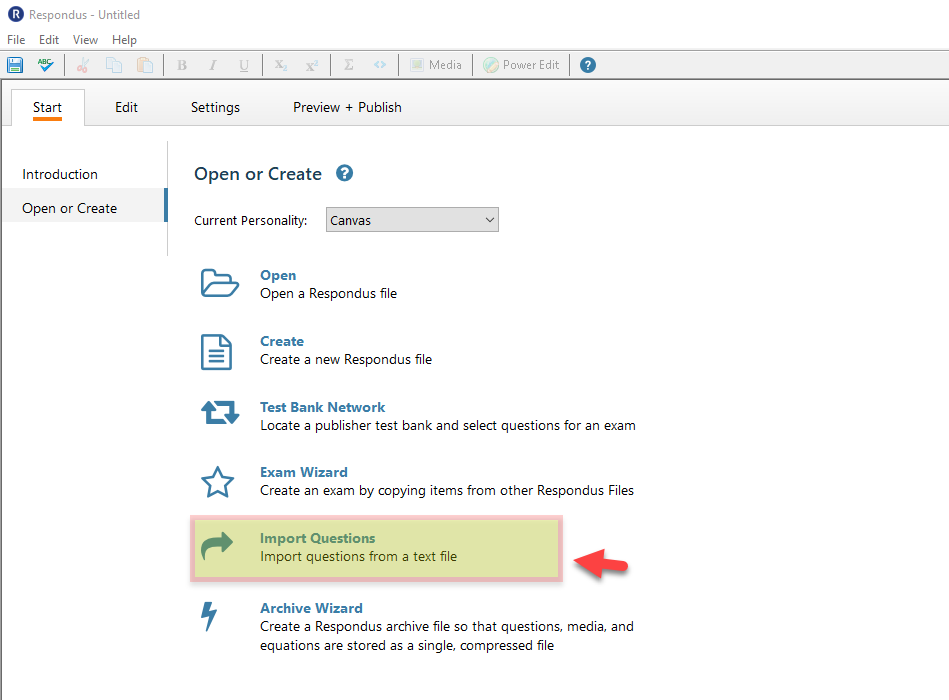
4. From the Type of file: drop menu, select whether you are using a Text or Word document.
If you are using MS word 2007 or newer to create your questions, select, the "DOCX"
file type. Then click the Browse button associated with the File name field.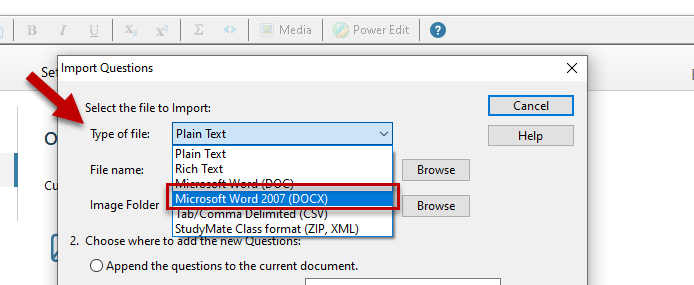
5. Navigate to the location in which you saved the Text or Word file, click the file
and select Open. 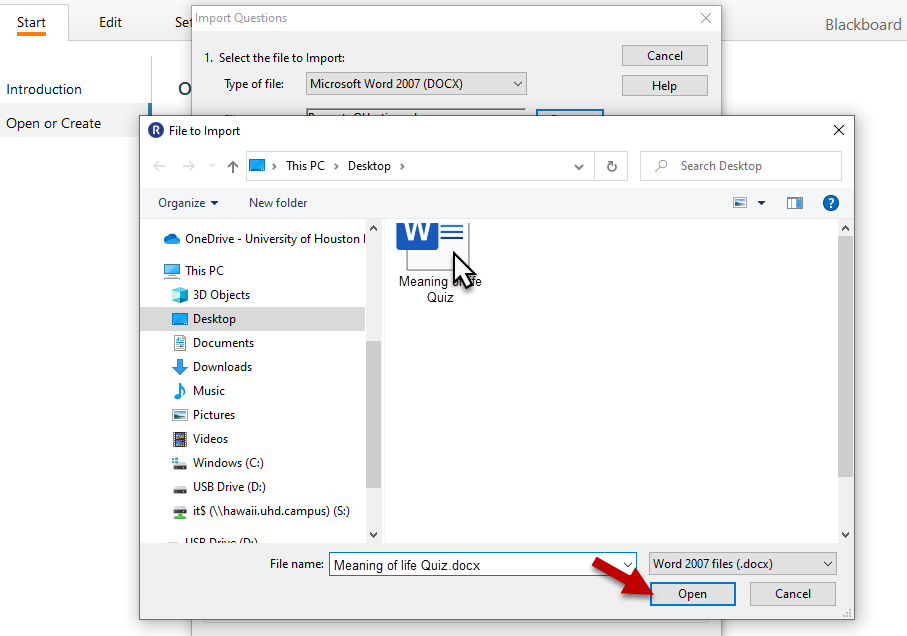
6. In the “Create a new document, named:” field, type what you wish your quiz to be named.
7. Click the Preview button. The questions in your quiz should populate with “No warnings” listed below.
If there are warnings, go back to your original document to look for mistakes.
8. Click Finish. 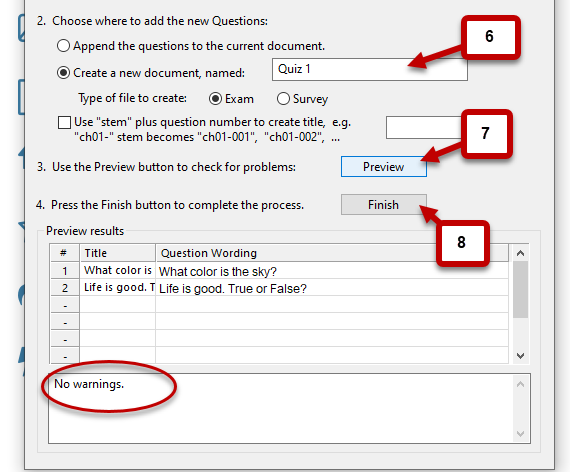
Publish Questions into Canvas
Note: You will need to Add a Canvas Server before completing this step. You will only need to do this once. You will not need to do this for every test created.
1. Once you have set up the server, you will be returned to the original Publish Wizard or Retrieval dialog box, with the new server information populated. Click Next.
2. a. Select the appropriate assessment type. A Question Bank will allow questions
to easily be re-used for future quizzes, but you will need to complete building the
quiz in Canvas, using the new Question Bank.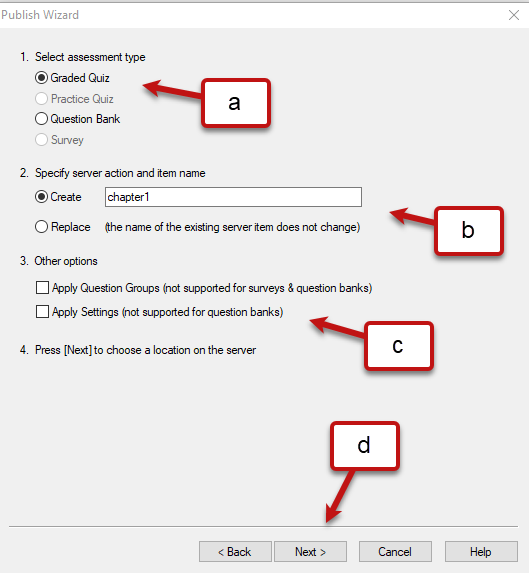
b. Select whether you want to create a new quiz or question bank, or if you want to replace an existing one.
c. If you designated quiz settings or question groups from the Settings tab, check the appropriate boxes.
d. Click Next
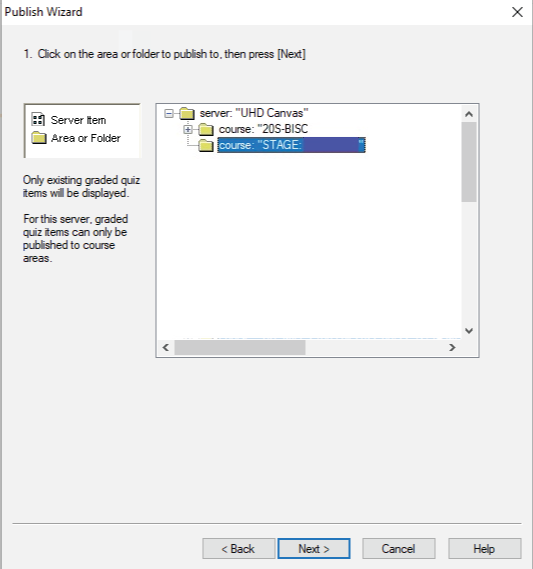
3. Your courses will be listed in a hierarchy tree format. If you selected the option to replace an existing item, expand the course folder and choose the item that you want to replace. Otherwise, if you are creating a brand new item, just select the course folder. Click Next.
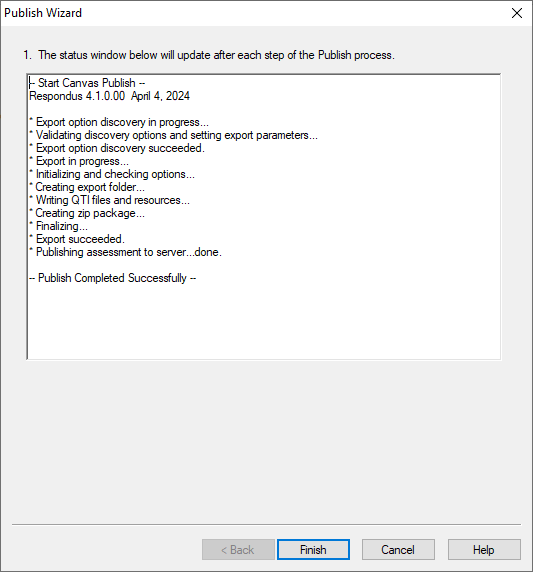
4. Respondus then displays a status window showing the progress of the Publish function.
The process may take a while to complete. When the process is fully completed, a
Finish button appears that will complete the Publish process. The assessment item
that you made should now appear in your Canvas course, either in Quizzes or in the
Question Bank area.
For additional support, Email TTLCHelp@uhd.edu