Create a Lesson In SoftChalk
Once you have completed the installation of the SoftChalk Create App using the steps above, launch Create from your Cloud account:
Open SoftChalk Create
1. Login to SoftChalk Cloud with your SoftChalk username and password.
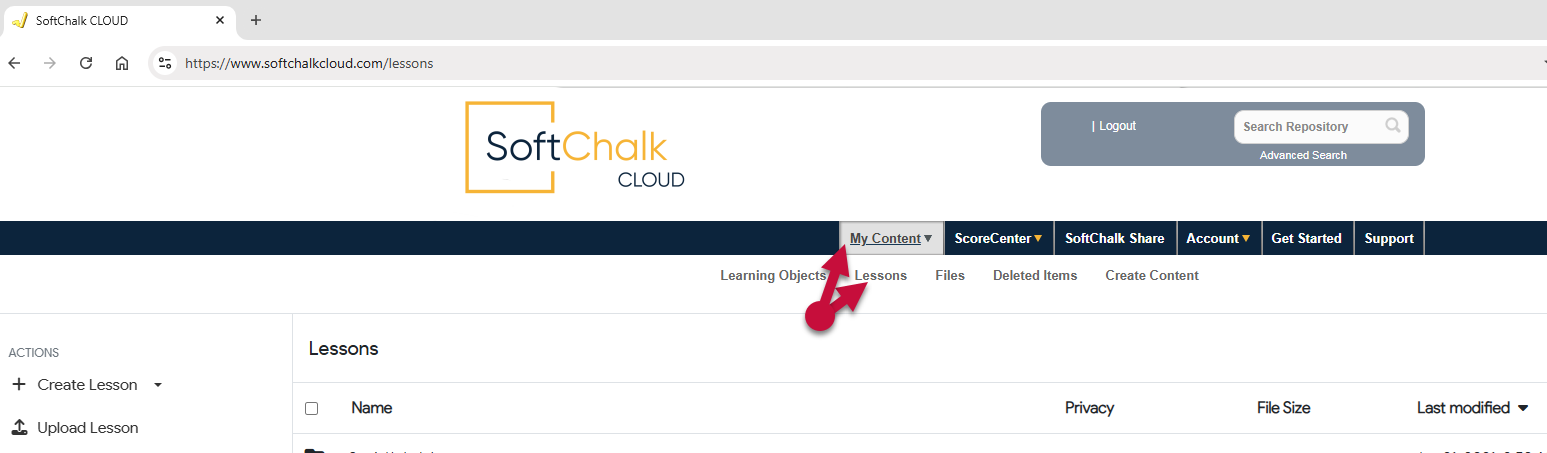
2. From the SoftChalk Cloud menus, choose My Content and then click Lessons.
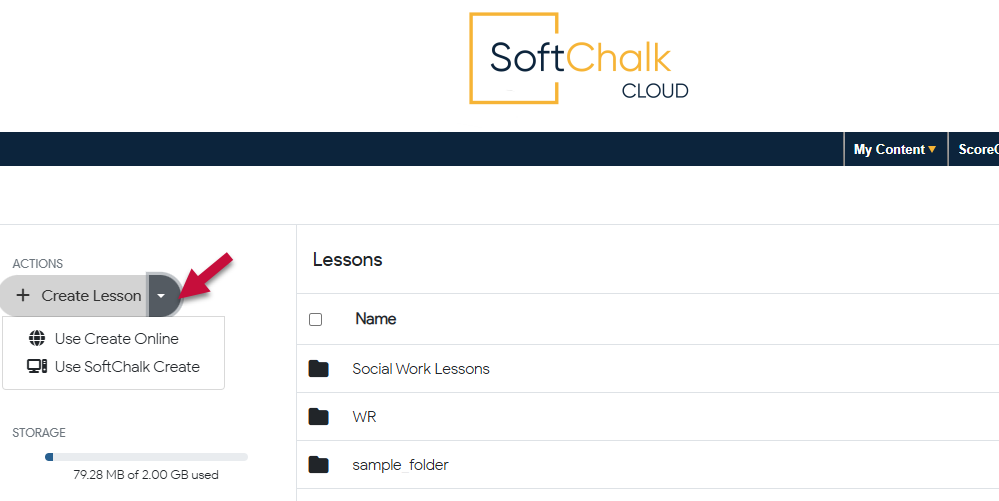
3. On the left hand side, click Create Lesson. You may create a new lesson Online or use the SoftChalk Create Desktop App if you have it installed.
4. Your preferred SoftChalk creation method will open.
5. The first time you open SoftChalk Create, you will be asked to enter your SoftChalk account information in order to proceed.
a. Enter your username and password.
b. Enter the license key then click Register. You are now ready to begin creating your SoftChalk lesson.
Note: If you need a SoftChalk License Key, reach out to UHD Canvas Support at ttlchelp@uhd.edu.
The SoftChalk Create app works like a word processing program. Simply type your lesson information into the text area of the SoftChalk Create app. You may also copy and paste text into the text area.
Edit an Existing Lesson
-
- Login to the SoftChalk Cloud.
-
From the SoftChalk Cloud menus, choose My Content and then click Lessons.
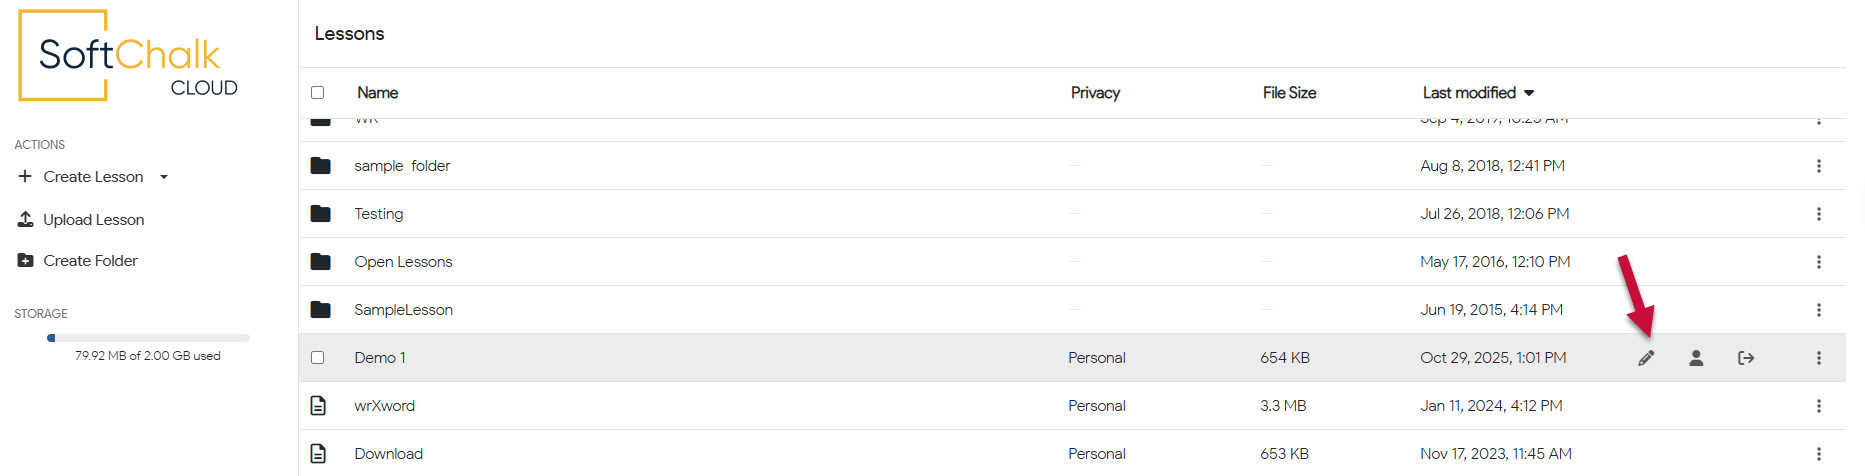
3. Locate the existing lesson in the Lessons area and click the edit icon to edit the lesson.
For additional support, email us at ttlchelp@uhd.edu