Importing and Scanning Documents to DocuWare
There are three different ways to add documents to Document trays in DocuWare.
- Import documents
- Scan documents
- Print to DocuWare
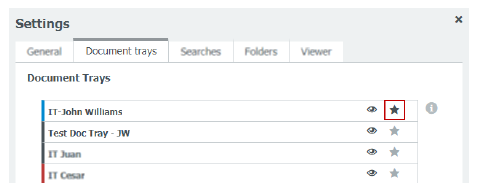
Document trays Settings
If you have access to multiple Document trays, then we recommend taking a moment to check your settings before you attempt to add new documents to DocuWare.
1. Click the caret next to your user profile.
2. Click the Document trays tab in the top level tabs of the Settings dialogue.
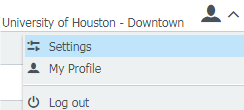
3. Click the star icon to the right of your preferred default document trays.
Importing Documents
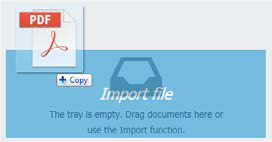
1. Start by opening your preferred document tray.
2. Click the Import button.
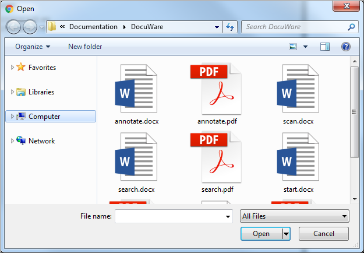
![]()
3. In the Windows Explorer dialogue, select the file(s) that you’d like to import, then click the Open button.
4. Alternatively, drag-and-drop the file from any local directly into the Document tray.
5. You should see an indicator when the documents import.

Scanning Documents
Before scanning, the DocuWare Desktop Apps should be installed and properly configured.
1. Start by opening your preferred document tray.
2. Click the Scan button.
![]()
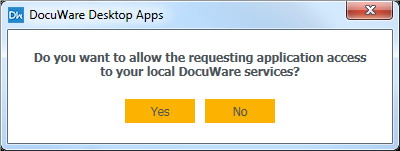
You may receive a dialogue requesting access to your DocuWare Apps.
In the DocuWare Desktop window, make sure that the Import Configuration field is set to Inbox.
This will ensure that the file will be uploaded to your Document tray.
Click the Open Scan Configuration link to open a menu of advanced scanning options.
For example, if you need to set duplex (double-sided) scanning.
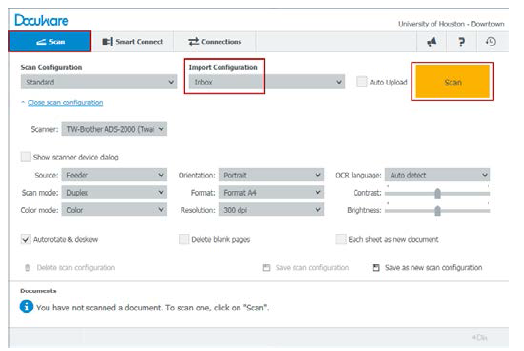
3. In the Scanner field, make sure that your scanner device is selected.
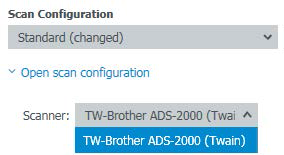
This field will be empty by default the first time you use the DocuWare Desktop Application.
4. Click the yellow Scan button on the right.
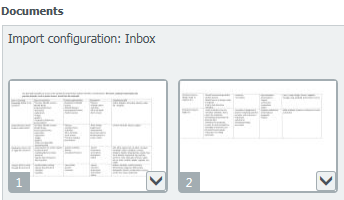
5. View the scanned images in the Documents area at the bottom of the window.
6. After confirming the scan image and import configuration, click the Upload button.
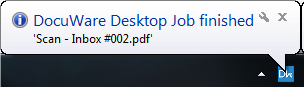
7. You should see a system notification when the scanned documents upload.
Printing to DocuWare
If the DocuWare Desktop App is installed and properly configured, you can print any file directly to DocuWare
1. Start by opening the document you’d like to print to DocuWare.
2. Open the Print dialogue
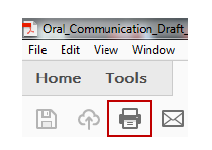
- Click File, then Print
- Click the Printer shortcut in the toolbar/ribbon
- Pres Ctrl + P on your keyboard.
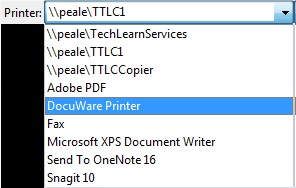
3. In the Print dialogue, click to open the dropdown menu of available Printers.
4. Select DocuWare Printer
5. Click the Print button.
![]()
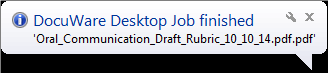
6. You should see a system notification when the scanned documents upload.
For additional support, visit UHD TTLC Support
Or, contact us at: TTLCHelp@uhd.edu